EC-Colorwash-360-Logo-600.png
 

 Welcome Guide: Organize and Prepare for Class


Organize

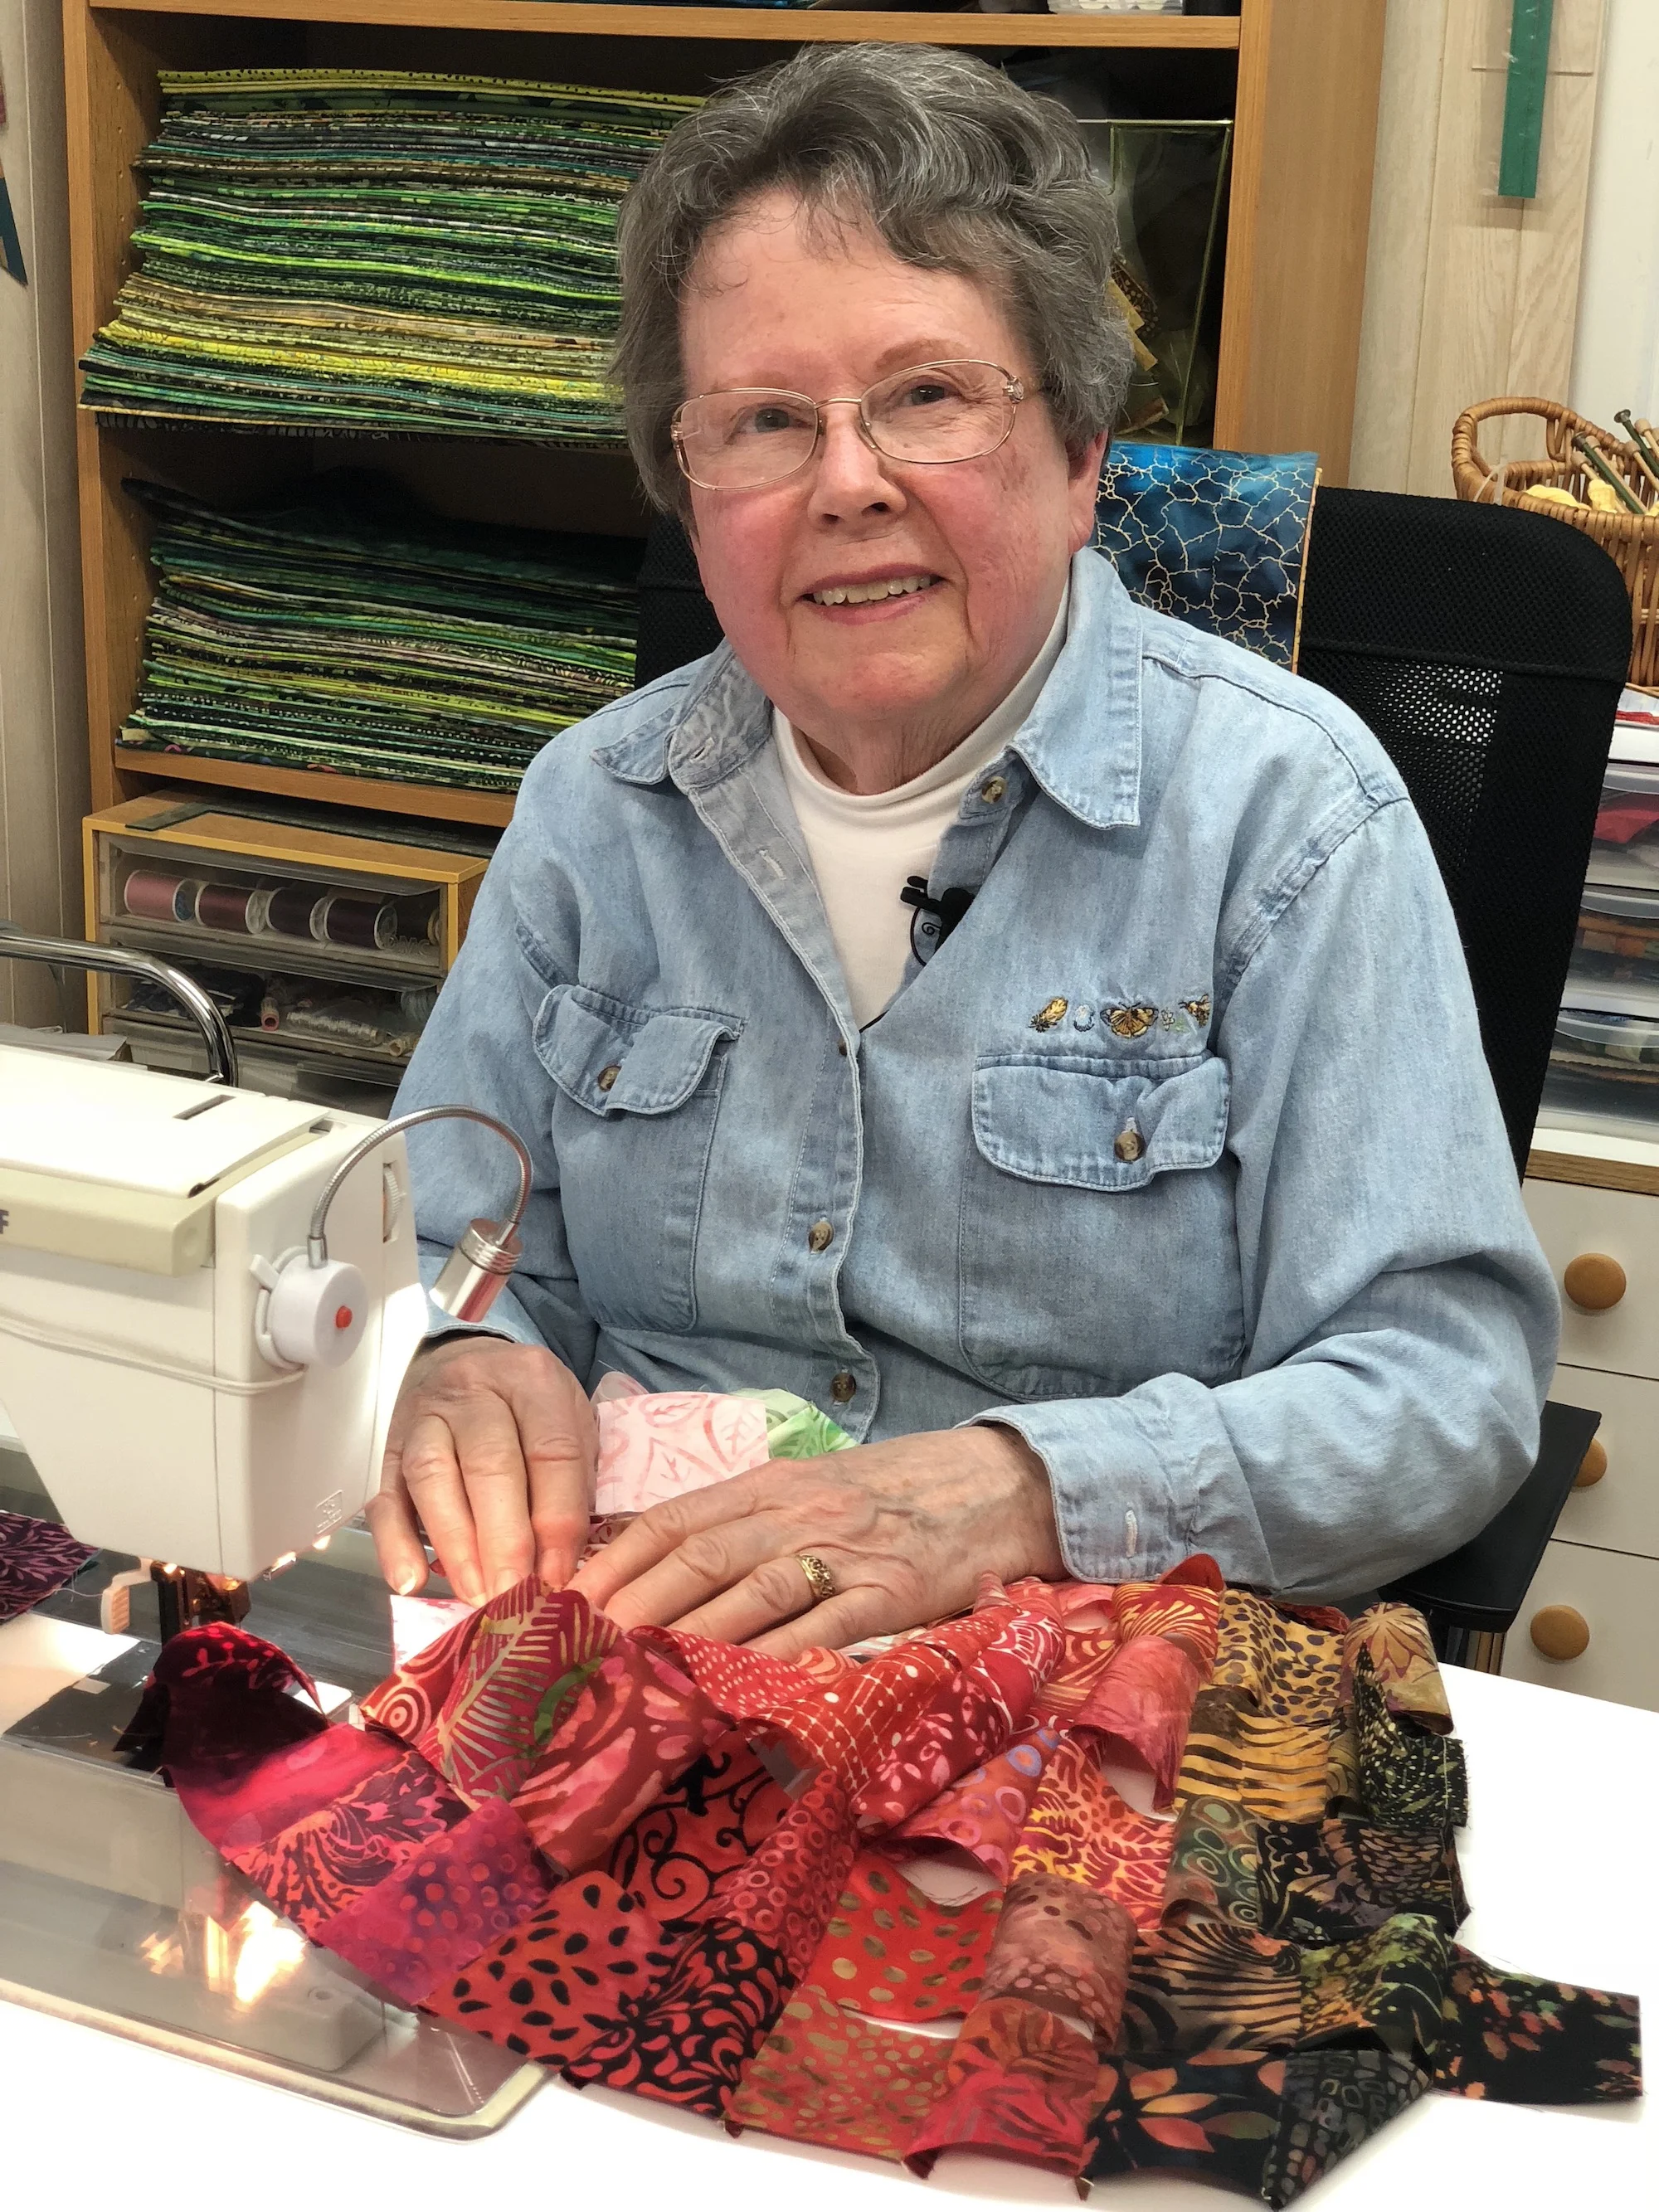
Workspaces You’ll Need:

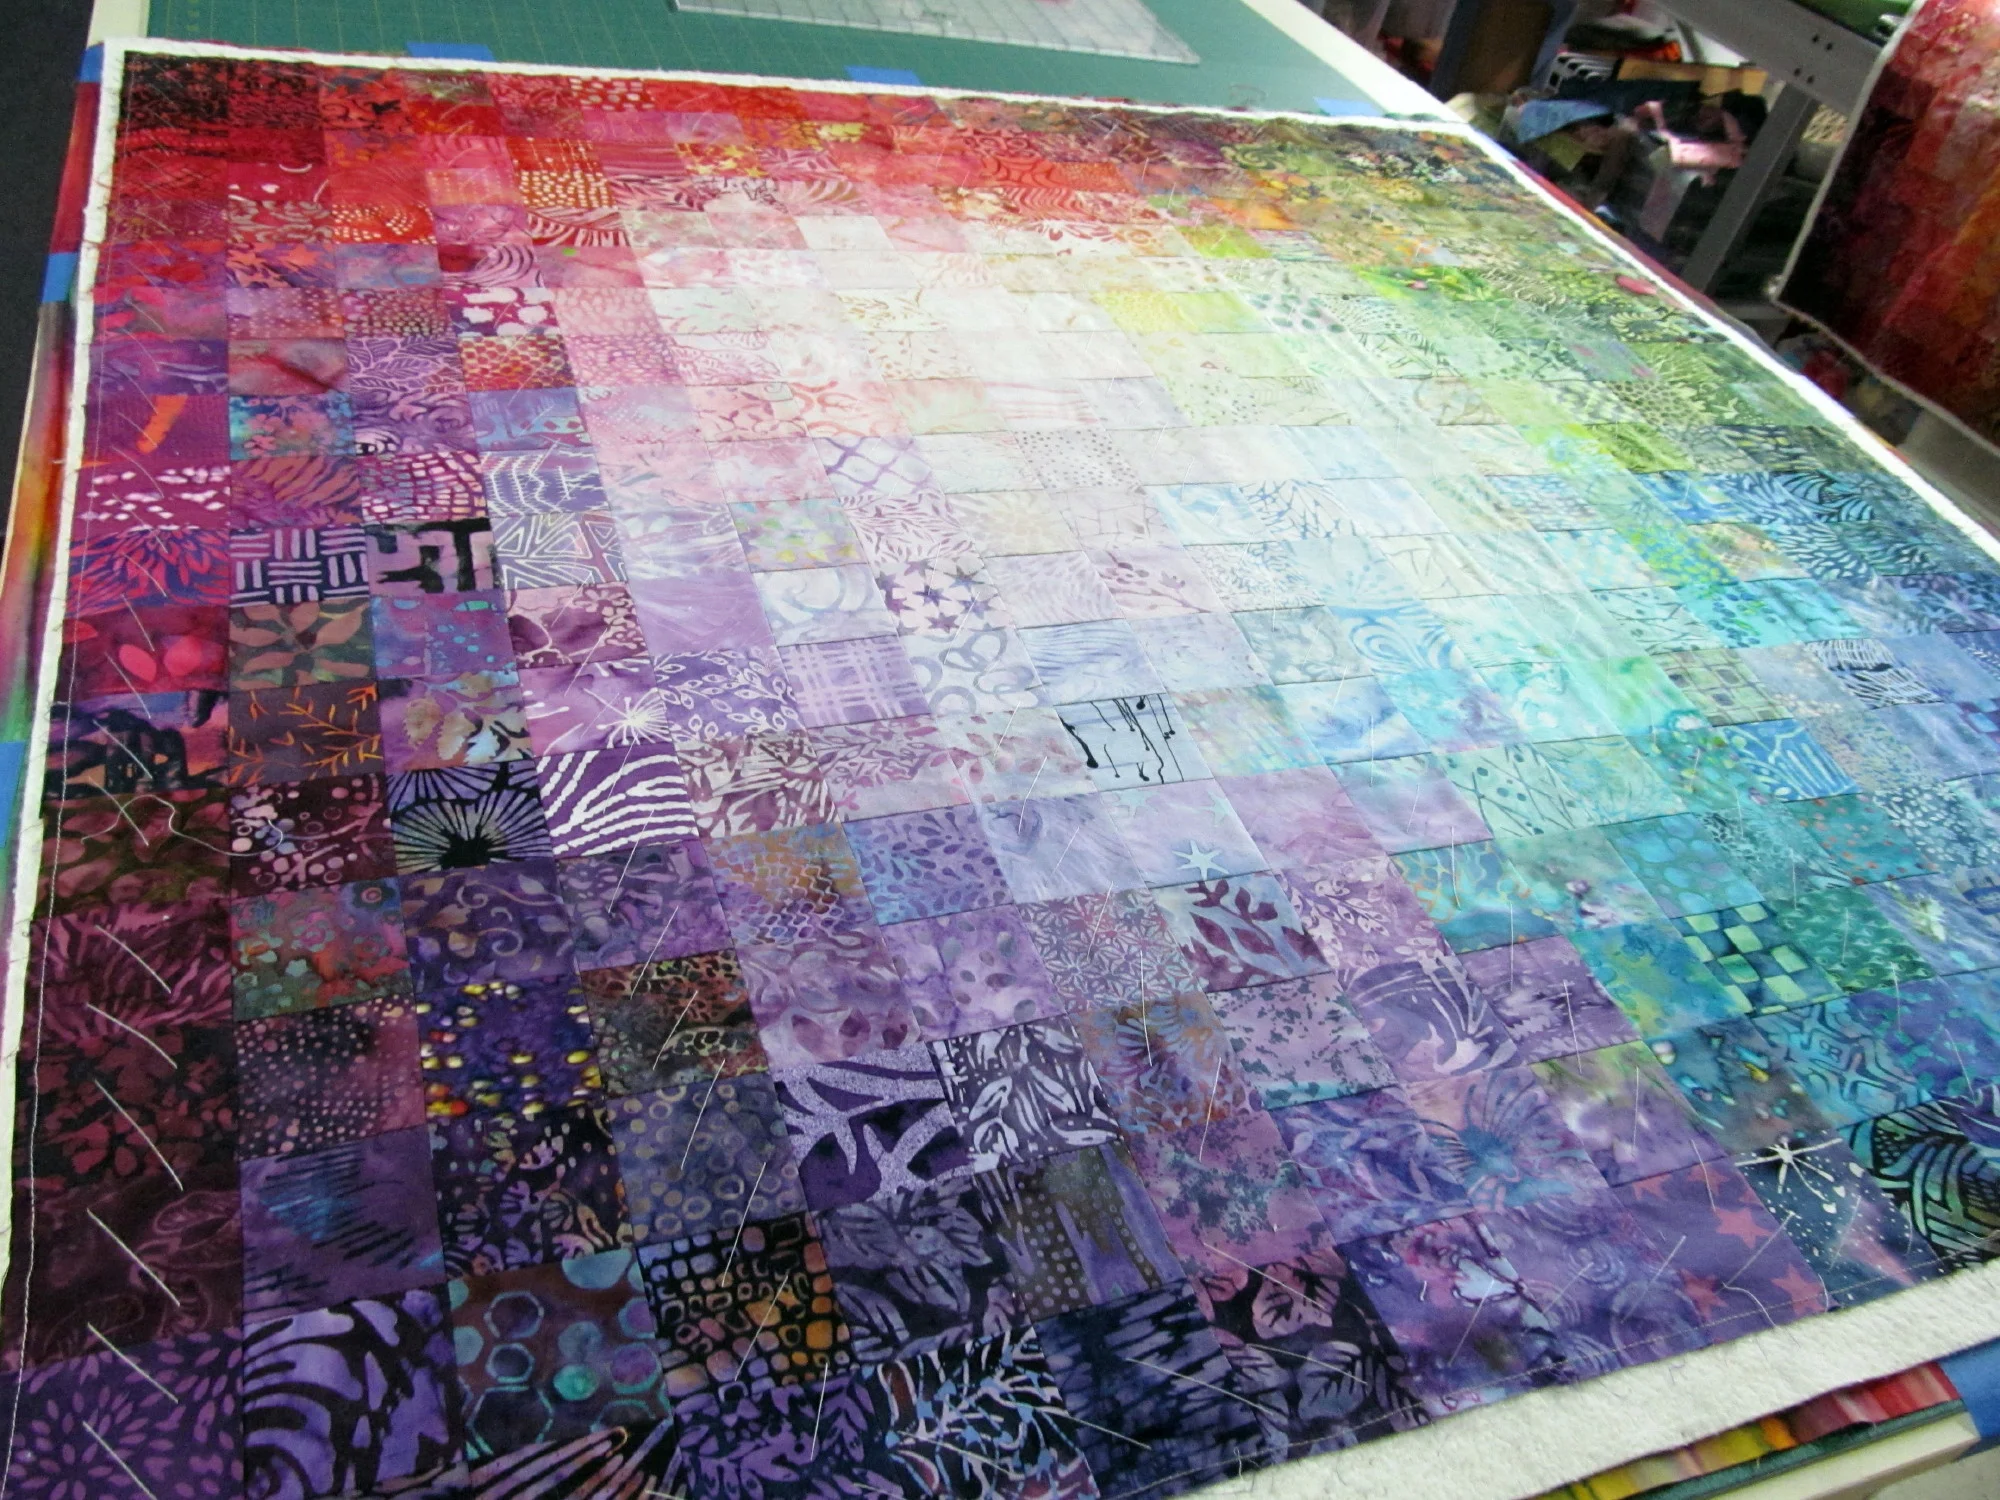
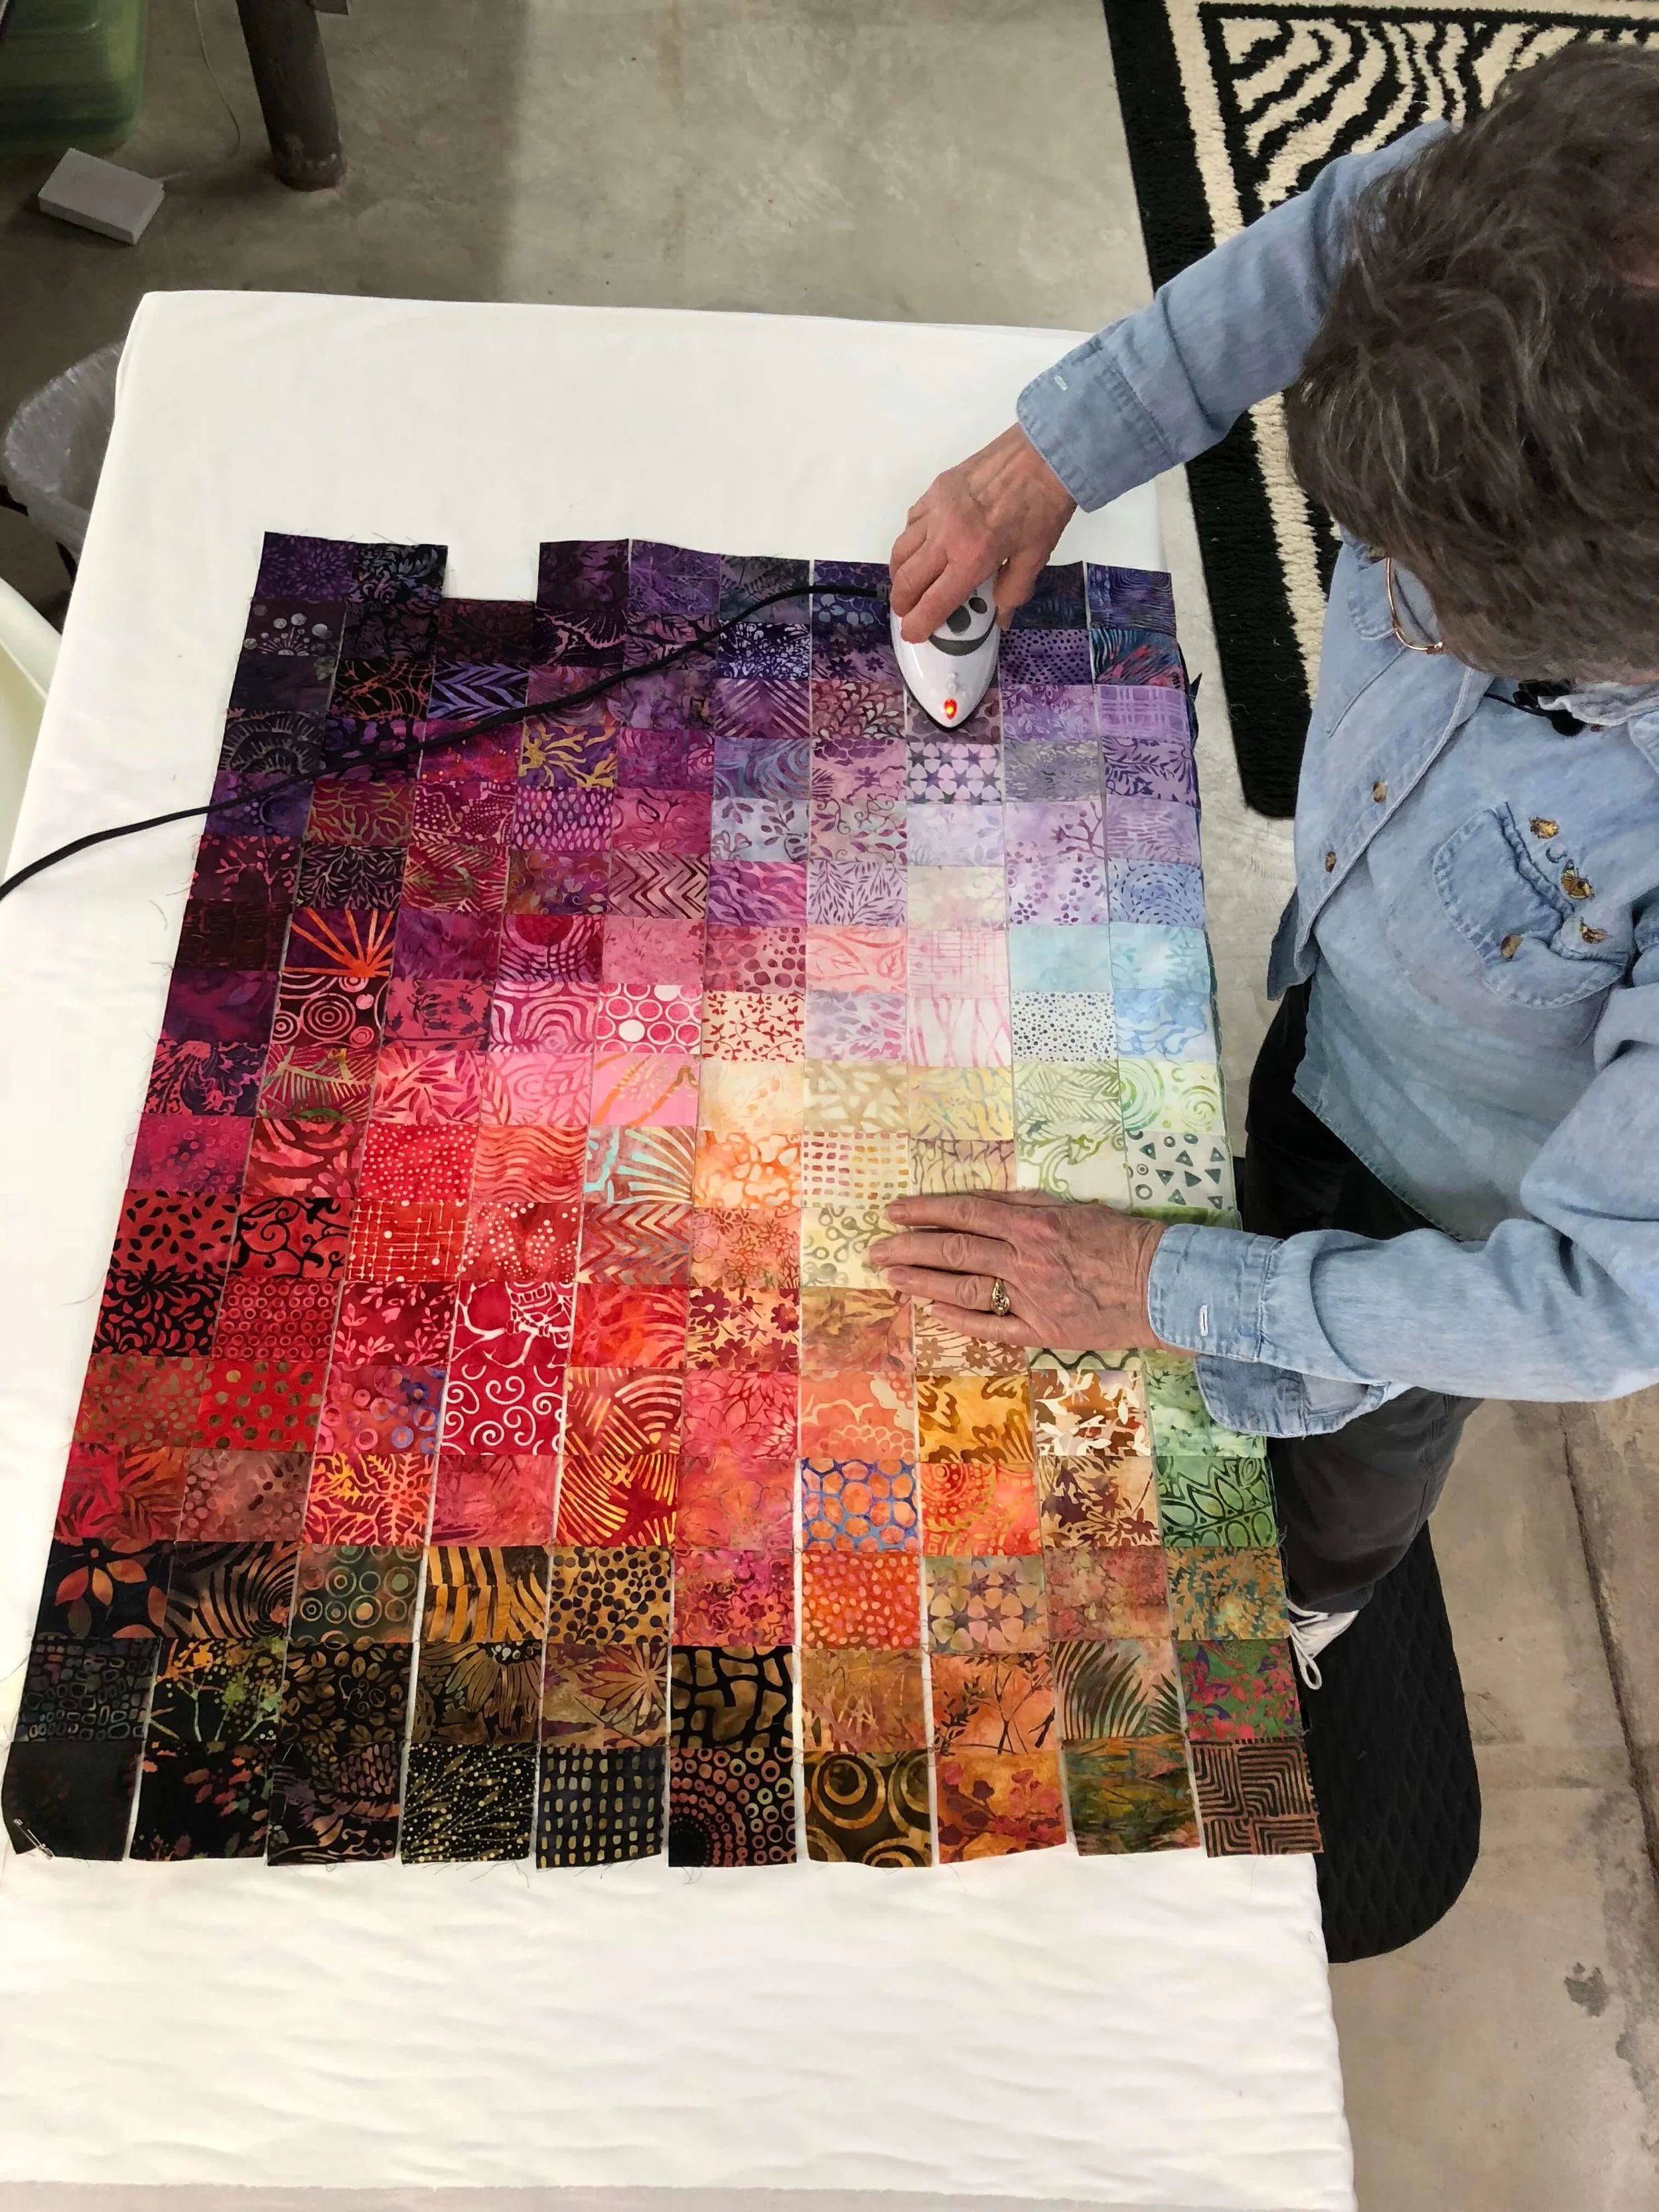
Cutting Area: Your favorite cutting tools for cutting 2.5” squares
Ironing Area: Ironing board and iron
Design Area: Information in the Resource & Supply List below
Sewing Area: Your machine and space around it tidy and ready to go
Basting & Quilting Space: Floor, tabletop…
Time: Set aside time 5-7 days per week over the 40 day Virtual Workshop (Oct 1-Nov 9) to progress gradually on your project along with your classmates to get the most out of the input from Wanda on your project and to submit questions relative to the weekly topics. But you’ll have 12 months access to the online course, so if you’re unable to participate at this time, the course awaits.

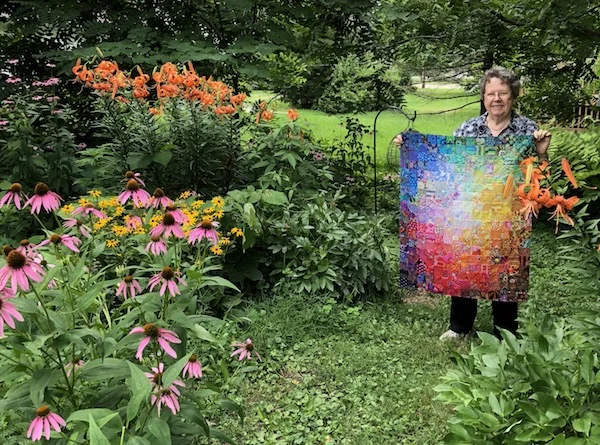
Wall space in a very visible place: To hang your amazing new Colorwash Wallhanging that everyone will want to hang on their wall!

Prepare

Look through the Resource & Supply list below to see if there is anything you need to optimize your workspace and materials.

Seek Guidance

ASK WANDA: Once you’re started on your project, if you come to a place where you’re stuck and need some advice - send Wanda a picture of your progress and ask her specifically about the stage you’re in and her recommendations to move forward. This is also an opportunity to just share your progress with her. Let Wanda know if you’re seeking help, or just sharing a picture of your progress.


Resource & Supply List

These are tools that Wanda uses for her Colorwash creation process. We’ve sorted the list of supplies from things she considers Absolutely Necessary to things that are Completely Optional.

And since we expect you’ll ask, we’re providing Amazon links so you can easily purchase similar items, if desired. We will receive a very small commission (that does not increase your price) if you purchase through our Amazon links below, so it’s a win-win!


ABSOLUTELY NECESSARY FOR OPTIMUM RESULTS:(click on each item below)

The Perfect Design Solution for You

Fabric for Colorwash

Finishing Supplies

Digital Photos

IMPORTANT:
(click on the item below)

Tools to organize & systematize your workflow.

OPTIONAL:
(click on the item below)

Tools that elevate the quality & success of your finished work


The Perfect Design Solution for You

  • If you are able to stand comfortably for an extended period of time, we recommend the following simple design wall that is lightweight, inexpensive and very functional. Wanda has 8 walls of this style in her workspaces.

  • If standing for long periods of time is out of the question for you we have some alternative ideas that will empower you to design one square at a time in the comfort that you require. See below…

LINKS:

Cotton Flannel Sheet for a Design Wall (works well for a 7’ tall design wall. Fabric is just over 8’ before washing and a great price. Also works for two table top design walls as described below.)

1.5” Foam Insulation Board Here is a link to see the board we’re suggesting for a full size wall that rests on the floor. This home improvement store delivers to the surrounding areas. This brand of insulation board is carried nationwide by most home improvement stores.

1” Foam Insulation Board for a Tabletop Design Board (described below)

Adjustable Height Fold-in-Half Table works well to hold a table top design wall.

Design Wall Alternatives:

Seated with a mini Tabletop Design Wall

TEMPORARY

Wanda has a temporary 30”x40” table top design wall made with foam core that is available at every art supply dept/store and office supply store. This smaller size is suitable for those who need to sit. It will produce a slightly smaller finished wallhanging that fits within the boundaries of the board. Wanda has made a number of Colorwash wallhangings that fit within this size range, so it’s certainly a usable size! You could layer 2-4 foam core boards and tape them at the edges/corners with masking or duct tape to make a thicker more sturdy foam core base (or consider the insulation board alternative that I mention next), and then add your flannel.

 
Remember to leave table space for your trays. For best results another table at your side would work best to hold the trays. Even a temporary, fold up card table.See the links above for an adjustable height fold in half table for a mobile/temporary …

Remember to leave table space for your trays. For best results another table at your side would work best to hold the trays. Even a temporary, fold up card table.

See the links above for an adjustable height fold in half table for a mobile/temporary solution to hold the design wall or trays.

PERMANENT

Score and break a 1” thick 4’x8’ foam insulation panel to size (or have them do it at the store for you. And if necessary, see if they deliver if it won’t fit in your vehicle.) If using the flannel sheet (63”x100”) as shown in the link above, cut the foam panel into three pieces: (2) 36”x48” and (1) 24”x48” remnant, and cut the flannel in half (2) 63”x50”. Then place the flannel on the board so in each direction it wraps around the back with enough room to secure with pins (or tape). You can stack the two walls one in front of the other to save space, or side by side on a long table.

On the Wall….simple & old-fashioned

If you have a large open wall section you’d like to use, pound a row of nails at the ceiling line and hang cotton batting from binder clips that are hooked over the nails.  Wanda used this as her full time solution before converting her basement to a studio.


Let limitations fuel creativity and problem-solving. If you don’t have the perfect (workspace, design solution) for your needs, innovate!

BACK TO THE TOP

Fabric for Colorwash

250-350 different fabrics to be cut into squares for the project.

Here are three ways to assemble your fabric palette:

  • (1) 2.5” Die-Cut Kit And some additional fabrics on hand to fill in gaps and fussy cut from if necessary (add some from your stash or add a 6” starter kit)

  • (2-3) 6” Starter Packs Add some of your own fabrics too.

  • Draw from your personal stash that you’ve been collecting for such a time as this:)

IMG_2503crop 600.JPG
IMG_1623 (1).jpg

2.5” Die Cut Kit

+300 pc Batik Kits still available

kit A actual fabrics.jpg

6” Starter Packs

+90 pc Kits A & B of both Pure Kaffe or Batik available

Copy of Time wasters tut (5).jpg

Use your own Stash*

Get it organized now following the details below.

*Using your own fabric stash:

All together you’ll need approximately 250-350 different fabrics in pieces big enough to cut at least one 2.5” square. If you have a larger piece and the pattern varies significantly, consider cutting a 2.5” strip so you’ll have a number of colors/values to work from.


You will need a large value range (8-10 minimum) spanning from nearly white to nearly black of the following color fabrics:

RED
RED-ORANGE
ORANGE
GREEN
BLUE-GREEN
BLUE
BLUE-PURPLE
RED-PURPLE
BROWN


You will need a smaller value range of these colors because they are mostly light value. Start from nearly white to slightly dark in each of these colors.

YELLOW-ORANGE
YELLOW
YELLOW-GREEN


We have lots of detailed information, photos and tips on what makes a good fabric/print for gradation in Module 2. A main rule of thumb is to choose busy prints. Anything that could appear as a solid fabric from a distance won’t work for Colorwash.

And of course you’ll need a sewing machine, iron, the cutting tools you prefer (die cutter, rotary cutter and rulers/mat), thread, scissors...all your general quilt making tools. 

Finishing Supplies - You’ll need the following:

basting a colorwash.jpg

For your convenience a list of the products that Wanda uses to finish her Colorwash Wallhangings:

(We will receive a very small commission from Amazon link sales - thank you!)

BASTING THREAD: 60 wt 2 ply fine embroidery thread Amazon Link
BASTING NEEDLES: John James size #7 Long Darner Needle
BATTING: Warm & Natural Cotton Batting Amazon Link
BACKING, HANGING SLEEVE & BINDING FABRICS:
For a Batik Colorwash
For a Kaffe Colorwash
QUILTING THREAD:
Order colors to match the areas you’re quilting (ex…light, red, grayed purple, green…look at your own piece and decide)
THREAD FOR REGULAR MACHINE: Invisifil Amazon Link
BOBBIN THREAD: Cotton to match your backing
THREAD FOR LONG ARM MACHINE: So Fine Amazon Link
HANGING ROD: any 28”-48” Cafe Rod works well and will not show if you make the hanging sleeve shorter than the full width.


Back to The top 

Digital Photos…

Photos are a very important tool in Wanda’s design process. And of course they’re the way she is able to blog each and every day sharing the day in the life of a quilt artist. You need to take photos of your work to make color and value decisions as well as to document your progress. And share with others!

AdobeStock_42079330.jpeg

Digital Camera

You don’t need an expensive camera or even great photography skills, but some way to capture digital photos is imperative for design. Wanda uses an inexpensive digital camera for all of her photos.

AdobeStock_113574251.jpeg

smart phone

The Smart Phone is nearly replacing the camera for the casual photographer. The ease of sending a photo to an app or someone else is so simple. Your phone is your camera, your email tool, social media and more.

AdobeStock_105679036.jpeg

Tablet

Another camera alternative is an iPad or tablet. Many enjoy the larger screen on this device and the photo quality is amazing too. This is another tool that equips you to not only take the photo, but view it in a large format and easily send it to all the places you want it to go.

Tools to Organize & Systematize Your Workflow

Space for your fabric squares to be spread out (during the 40 day process and beyond). Wanda uses nesting disposable aluminum trays to sort her fabrics onto and store the remaining pieces pre-sorted for the next time she makes a Colorwash. You could also use a nearby large tabletop or bed as long as you can keep the fabric laid out for the duration of the project. (+30 days…) and the surface is located within a few steps from your design wall.

Colorwash trays done.jpg
 

Note: These trays are not to be carried to the design wall while you’re working, they are to be placed on a table or surface beside the design wall, so a super sturdy tray is not necessary. Because these are light weight they don’t put pressure on the lower trays and create wrinkles in the fabrics when stacked for storage.


Binder clips organize and eliminate confusion. You’ll need around (+20), Here are a couple different styles available:

LINKS:
CLIP Option One - Asst. Colors
CLIP Option Two - Black

Colorwash wallhanging ready to sew.jpg
 

Tools to Elevate the Quality of your Finished Work

PRESSING:

Wanda uses her strong finger nails to press the seams as she goes. If you don’t have long finger nails or wish to use a tool for the process here are a couple she recommends. 

LINKS:

Seam Creaser Tool
Option One or
Option Two


MINI IRON:

Because Colorwash squares are just about 2” edge to edge once sewn, it can be difficult to press such small rows with a normal size iron. Wanda uses this mini iron for every Colorwash.

A Mini Iron is the perfect size for pressing seams left and right on small blocks at the ironing board.

LINK:

Mini Iron perfectly sized for Colorwash rows

IMG_1501-2.JPG
 

Lighting:


Precision seam intersections are vital for quality end products, Wanda uses an additional flexible Light to direct the light source exactly where she needs it.

LINK:

Light for Sewing Machine  

Wanda uses Daylight Fluorescent bulbs overhead for true natural color. Look for a CRI rating of 90 or above.


IMG_1725.JPG


COLOR ORDER:
Having a ColorWheel nearby is very useful when making a Colorwash. We will have this one available as a print out, but if you’d like to save on ink and have one in a durable type material, consider investing in one of these:

LINKS: 
Option One
OptionTwo
Option Three or
Option Four 

Colorwheel for Colorwash 360 © Exuberant Color


PLACEMENT:

Keep your design centered on your design wall for optimal design and productivity by marking center with a chalk line.

LINKS:
Option One
Option Two


Invest in yourself in ways that empower you!